I got tried of my ghetto stock switch panel. Over the years I had installed some switches but really the switch panel isn't really designed to take standard switches. The panel is actually a plastic sticker and it flexes and tears easily. So, I got around to redoing the panel. At first I was going to remake the whole bracket that sits behind the sticker but if I was going to change things around, I'd have to make a whole new bracket each time. So, I elected to reuse the plastic bracket. This was a good move since I ended up changing the panel a few weeks after I first installed it.
Things you'll need:
- 22 Gauge Steel
- Switches
- Phillips Screwdriver
- 3M Molding Tape
- Drill
- Bi-metal Saw
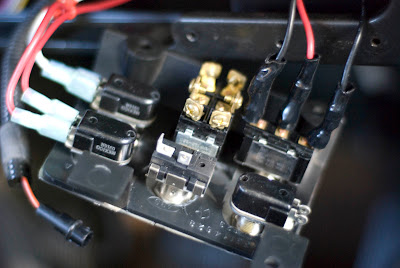
So, the first thing you'll need to do is take apart the dash. This is pretty easy. There are 6 screws holding all of the plastic in place. First start with the two screws that hold the cover panel for the 'Idiot Lights' between the two gauges. The panel should slide up and pull out. There are 4 more screws in the larger panel. Two up top in the corners and two down low. There will probably be a cable that will fall out from behind the dash when you remove this panel. The cable is for a light that illuminates the switches but won't have a bulb. You can see the clip that hold it to the back of the panel you just removed if you flip it over.
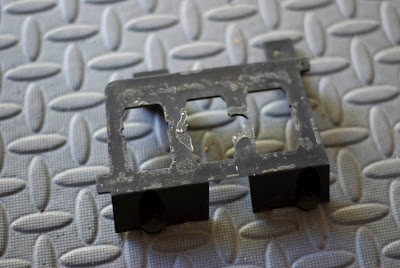
The bracket that holds the panel has three screws. One is shared with the gauge and two below. There is a tab that sits behind the gauge cluster to be aware of as well. Once the panel is out, you'll see three slots. This panel is originally for the OE fog-lights and AC unit. If you wanted to place the switches in any location, you could cut the center supports. If you look closely to the one picture, you'll see that one was drilled into.
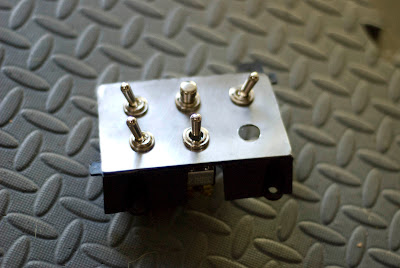
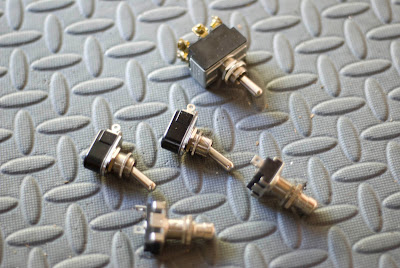
Spacing will really depend on the switches you use. I chose Medium and Heavy Duty AC switches. I liked the industrial toggle switches more then the rockers or cheap DC switches you normally find. These are better quality and have a higher amp rating as well. For this project, I went with two 'Single Poll Single Throw' (SPST) On-Off. These control the OBA Compressor and the Electric Fan. The next set of switches is a push-button SPST On-Off to activate the next switch. It is a Double Poll Double Throw (DPDT) (On) - Off - (On) Momentary. It controls the winch which is why it's a momentary switch. The next set of switches are a SPST and a Double Poll Single Throw (DPST). These control the lights. The DPST controls two separate bulbs in one light. It could also be used to control two different lights as well.
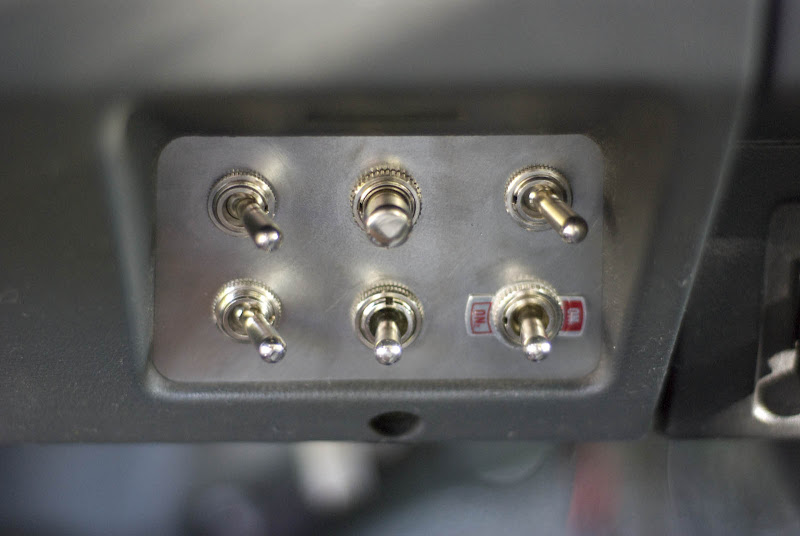
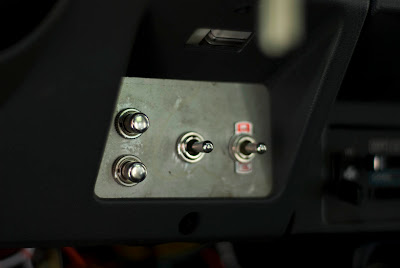
With these switches, I ended up mounting the 4 outer switches sideways as there just wasn't enough room for the wiring as they are offset and have the wiring coming from the side and not the back. I ended up modifying the bracket some to allow the switches to have a bit more room between them, especially if they all were oriented up and down. I did notice that the panel is a bit offset when the plastic bezel dash is on which did squeeze the upper right switch a bit. It isn't too bad though.
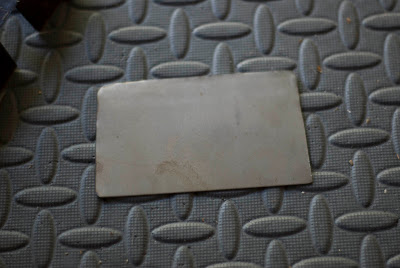
To remove the plastic sticker just pull it off. You'll notice that there are two alignment pins at two corners. When you cut the panel, you'll not need these. Trace a shape that simulates the sticker but you can leave out the tab areas where the pins go. I ended up going the rough cuts with a hacksaw and then cleaning them up with a bench grinder. I ended up tracing the switch opening off the bracket onto the panel to give me some reference points. The lower switches are all at the lower edge of the reference marks. I ended up using a Dremel with the sanding wheel to open up the opening a bit. I had used the upper reference marks as my drill point and the switches were more in the middle of the panel. So moving the holes up will make the panel look more symmetrical. While I was at it, I used a metal brush attachment on the Drill Press to polish up the panel. So, that's why it looks nice and clean. I didn't bother to paint it. I'm not sure if I will, it looks too good to cover up.

Now to put it all together. Use the 3M Molding tape, and apply a few strips to the bracket. This stuff is strong so you don't need to do a whole side unless you really want to. I originally applied large strips and they were a pain to remove. The panel didn't want to come off without some prying. Once the panel is on it won't go anywhere. Next, all you have to do is organize your switches. Once that's done reverse the steps earlier to put the dash back together. If everything went as planned and you're not FourbangerYJ, you should be all set.