Well, here it is lights. This one comes up a lot in forums. I'll try to hit on a bit of everything. So here goes.

There are many lights available. Different shapes, sizes, wattage and price. Quality lights are going to cost a bit of change. What's the difference between a $20 light and a $200 light? These are very important when choosing a light. The shape of the reflector can be tuned for optimal spread. What is the optimal spread? Well, that depends on what the light is designed for. There are Floods, Fogs, Driving, Spots, Projections and Pencils. Basically, the spectrum goes from wide to narrow beams. Cheaper lenses and reflectors are generally not as efficient as more expensive ones. It should also be noted that it isn't always necessary to pay top dollar for a decent light.


A wire harness is a good sign of a decent kit. The harness is an important part of of the kit. The harness should come with a 30A relay along with wires, plugs, fuses and switches. These are all just as important as the lights. Cheap lights used to leave out relays and would have +12v running from the battery to the switch then to the lights. This is not only dangerous but also isn't very efficient. Under heavy load the wires could heat up and melt the insulation, causing a short and perhaps a fire.

Optimally, you will have a fuse near the battery. The light is connected to the relay. The relay is connected to the battery and the switch is connected to the relay. The relay acts like a switch. Low power goes to the switch which helps prevent the switch from getting overloaded. The switch controls the relay. The relay then sends power straight to the lights. The most common relay is the Bosch 30A relay. These are the classic black box with 4 prongs setup.


Ok, next comes the hard part wiring. If you're lucky, it will all be done for you. If not, you will need to find a place for everything first. Mount the lights, then figure out where to mount the relay. The relay usually goes on the fender or firewall. Then figure out where to put the switch. Run the wires from the lights to the relay. Then run the switch to the relay and finally rig up the battery. For the switch you will have to locate a rubber grommet and drill a hole so you can pass the wires through. If you're doing this from scratch, use small zip-tie's to hold the wires together. This will help keep it all organized in case you have to rewire something later. Also, where you can, put the wires in the stock loom when possible. This will make for a cleaner install. Once it's all wired together you're just about done.


If you're like me and trying to resurrect a set of used lights with a sorry looking harness, I'll give you some tips. First, if all the plugs are usable, reuse them. You will need to pop the clips out of the plug and try to get the wires out without destroying the connectors. Each plug will require something different to get it to work. The large crimp is usually the easiest to open. The smaller one might be imposable. If it is, don't worry. Solder the wire led to the connector and it will be fine. I'll post a few pictures of what I did.


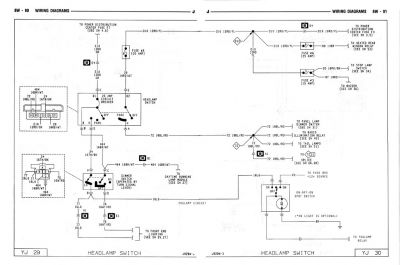
<center>
HeadLamp and FogLamp Schematic</center>
<center>
(*This schematic will allow the lights to turn on when the headlamps come on. It will also allow you to turn them on independantly as well as turn them off.)</center>
<center>
</center>


